
VIVARIUMS 101
(PART 2)
So the next few steps are a bit more fun if you are a right-brained individual (although I have read that some studies show this concept is untrue and that both hemispheres of the brain are active in both analytical and creative thought... regardless...).
STEP 4 - Prepare surfaces for the foam vines and 'bark' texture
The logic behind this must be explained I suppose. The goal is to cover everything in a layer of 'bark' like texture. This requires first a layer of wet silicone BUT I cannot apply silicone to an open metal mesh grid such as exists in the tree trunk frame... so I thought, paper mache! It worked like a charm.
a. Mix up some paper mache gloop, cut some strips of news paper and have at it. If you have never done paper mache, there are a lot of different recipes. The one I used was basically a cup and a half of water, a cup of flour and a tablespoon of salt (to inhibit mold growth). Mix well, thoroughly wet the paper strips and start applying to the frame... then wait 24 hours for it to completely dry.

b. You will notice two additional steps I took before snapping the above and below pictures. First I applied a layer of clear 100% silicone to the back three walls of the aquarium using a putty knife. This gives the expanding foam something to stick to (it doesn't stick to glass as well without the silicone.) ***MAKE SURE you apply the silicone in a well ventilated area... the stuff has some serious kick to it.

STEP 5 - Time to grow some jungle vines!
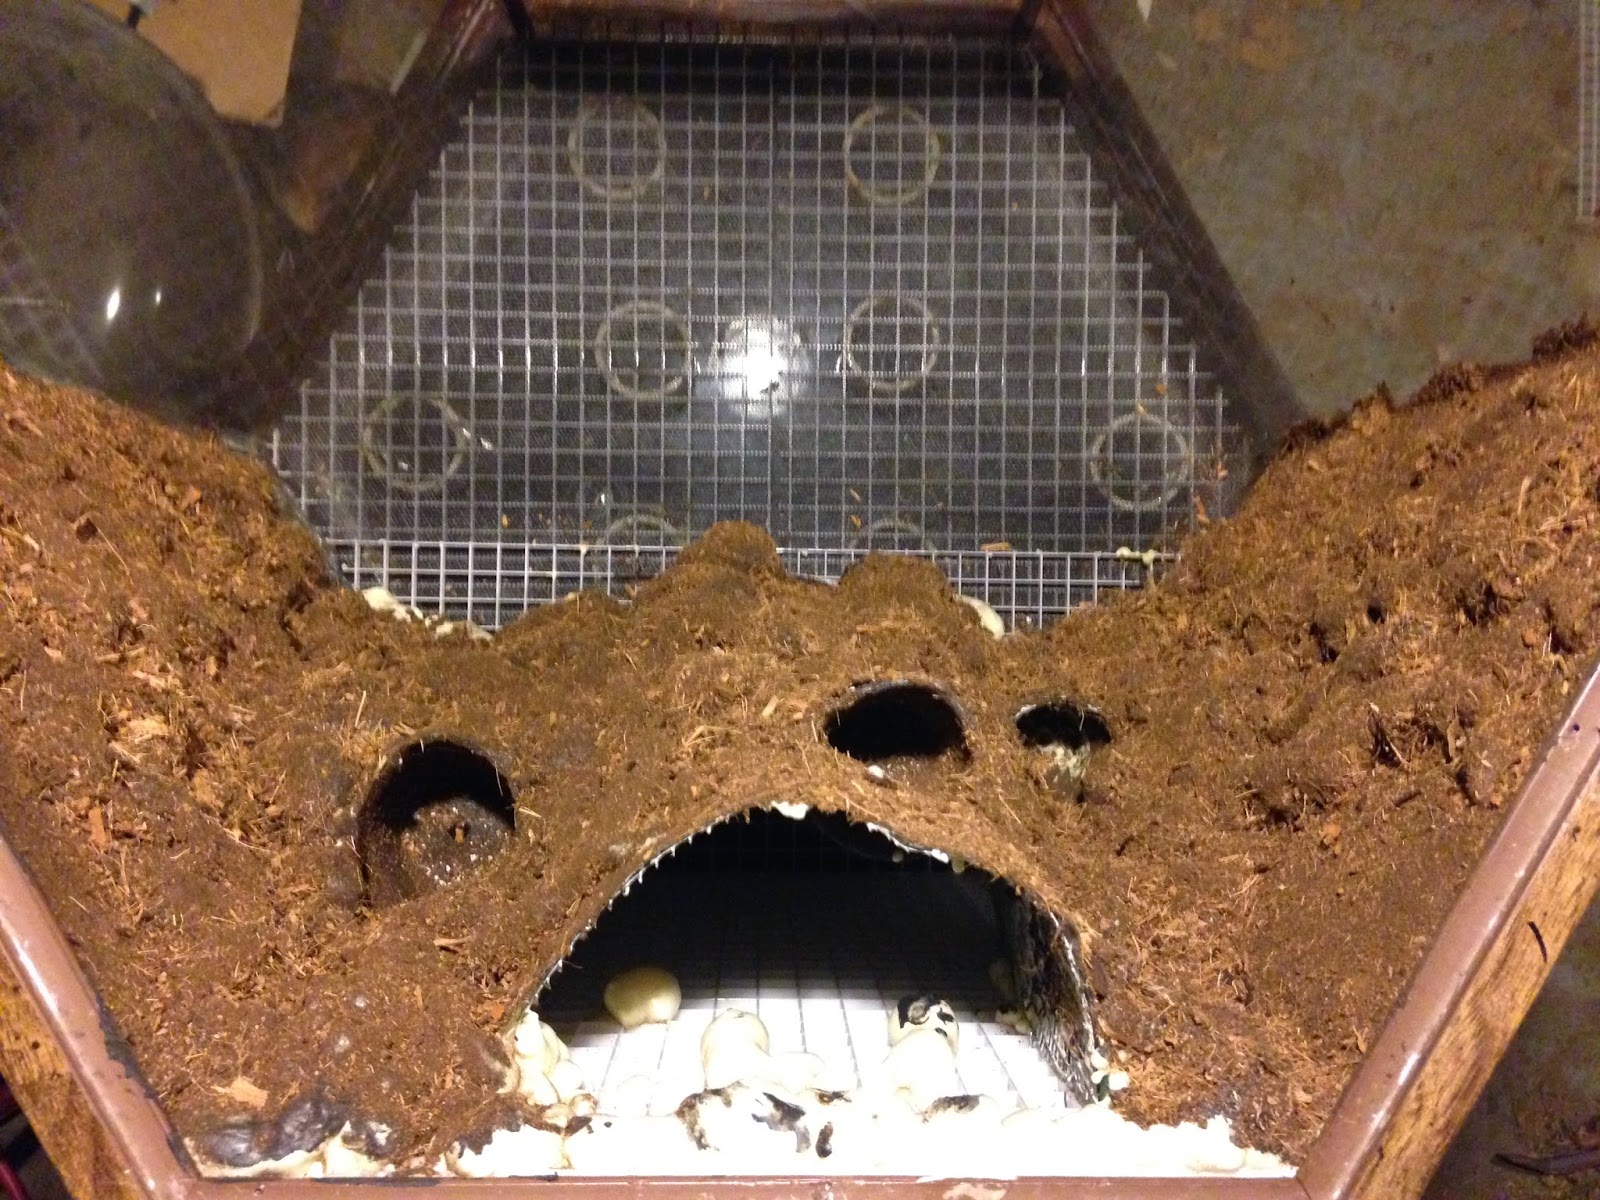
The next step involves a little artistic ability... not much but a little helps. The idea is to create vine-like structures both on the tree trunks and the back three walls which will be covered with bark texture later on. The foam I used is called 'Great Stuff' and is available at virtually any hardware store you go to. Start off with a few test runs on a piece of cardboard if you aren't confident about it... once you get the knack then start working on your 'real' canvas. I tried to cover ANY exposed plastic grid first and from there started making vine shapes both up the trunk and out and away on the walls. **JUST BE CAREFUL you don't put too much foam behind the tree structures because you might block the drainage path for those three planters... you want water to be able to drain straight down to your drainage layer.
NOTE - the application of the foam will make the grid insert for the tree a PERMANENT resident so... makes sure it is placed correctly before that first spray of foam.
 |
| Notice some of my vines don't all go all the way to the bottom to meet the false floor... I will have 3" of substrate so it all gets covered up anyway. |

Let the foam sit for at LEAST 24 hours before moving to the next step. If you want to be extra cautious wait a couple days.
STEP 6 - Applying the bark layer
b. Next you will need some colored 100% silicone. I used black but after the fact realized that brown would make more sense if you can find it. That way if the texture starts to fall off at some point, you will still have a wood colored backdrop even without the texture.
c. Before you start you'll need some latex gloves (probably several pairs since you likely won't get it all done in one go) as well a putty knife or three. The idea is to coat a layer of the colored silicone on every surface of the back drop as well as the already silicone covered glass... so glass, paper mache and foam vines all get 'painted' with a fresh layer of silicone.
d. Since the silicone will get less and less tacky as it dries over the course of about 7-10 minutes, you really have very little time to work so I recommend doing a section at a time. Use the putty knife where ever you can but just use your fingers to get the silicone into all the cracks and crannies until an entire area is well coated. THEN take the gloves off, grab a handful of the bark texture you mixed up earlier and start throwing it onto the silicone in a thick layer. Carefully pat it down to make sure all the silicone gets covered with texture. Give that a few hours to dry and then tilt the tank over to let the loose debris fall off and out (I used a plastic trash bag as a ground cloth to catch all the unused texture and put it back with the rest I had mixed up.)
e. Repeat this process until you have the whole thing covered. I also had to go back a few times to touch up areas I later found I had missed OR the silicone had dried enough to not hold enough texture well. Here is the final result:

Overall it is a pretty cool effect I think. I read about it so I can't claim credit for the idea. As I mentioned, the bottom section that looks a little sloppy doesn't matter because it all got covered by a layer of substrate.
STEP 7 - Adding the substrate and plants
Now for the most rewarding part... finishing it off with live plants. I would recommend doing a bit of research here and then picking plants according to both your preference and also what works well for an amphibian vivarium. There are tons of forums and websites with info on what plants are good choices for what type of animal enclosure. I bought most of my plants online and again there are a TON of places to buy from at reasonable prices.
I got the substrate from here - http://www.neherpetoculture.com/substratesvivarium
Basically from here you just place about 3" of substrate into the vivarium and begin planting. I did a sort of sketch of where I wanted to put what before I got started. After I got everything planted, I used pillow moss to fill in the rest of the surface area of the substrate floor. The moss will spread out a bit so it doesn't have to cover 100%.
After that I installed a mister (The Exo-Terra Monsoon) which comes with a couple nozzles that are placed with suction cups near the top of the tank. The two nozzles don't quite get the entire tank effectively misted so I am going to buy a third. Anyway that is about it... below is the finished product. After the plants get rooted in and seem healthy we will be adding a frog or two.


