
VIVARIUMS 101
(PART 1)
So it's been far too long since my last post. New job kept me distracted. Anyway, my daughter and I have been working together on a vivarium as the future home to one or more red eyed tree frogs. We finally completed it and now are just waiting a few weeks for the plants to settle in before we add the critters. I thought I would go ahead and photo document the process in case anyone has any interest in doing this themselves. I found some fairly scattered info online but no start to finish 'how-to' examples. That is what I will attempt here:
STEP 1 - Picking an aquarium
In our case we already knew we wanted tree frogs and although my first attempt was in a standard rectangular 10 gallon tank, I've read several places that tree frogs do better in vertical tanks rather than horizontal ones AND you need 10 gallons of 'space' per animal. We don't know how many we will eventually have but we found this 40 gallon hexagonal tank that I thought would work well.
This is the finished product:

I also commissioned my father-in-law to build a tank 'stand' I designed using Google Sketch-up.
STEP 2 - Build a false floor for drainage
 Many terrariums and vivariums use some sort of drainage base with rocks, clay pebbles or even marbles without an actual drain hole in the floor. This is fine unless you want to maintain a relatively high humidity level which requires fairly constant misting. That means you are using a lot of water and eventually you are going to saturate your drainage layer and end up with a mini swamp. To avoid this you can create a false floor and use an actual drain. Since this was a hexagonal tank, cutting the floor was more difficult but with the help of my trusty Dremel tool it wasn't that bad.
a. Basically I made some measurements and looked up the exact angles of a hexagon (120 degrees) and made a paper template to match the floor of the tank. I then traced that template onto a ceiling light diffuser panel and cut it out with the Dremel tool (be prepared to get melted plastic all over your cutting wheel... had to constantly clean it off).
b. Next I created some 'pylons' out of PVC pipe and notched the bottom of each pylon (so they wouldn't get filled with drain water) and then attached them to the false floor using epoxy (took me a few tries to find a good adhesive to attach PVC to plastic... super glue super failed!).

**Notice I had to cut the floor into two sections to make it easier to install.

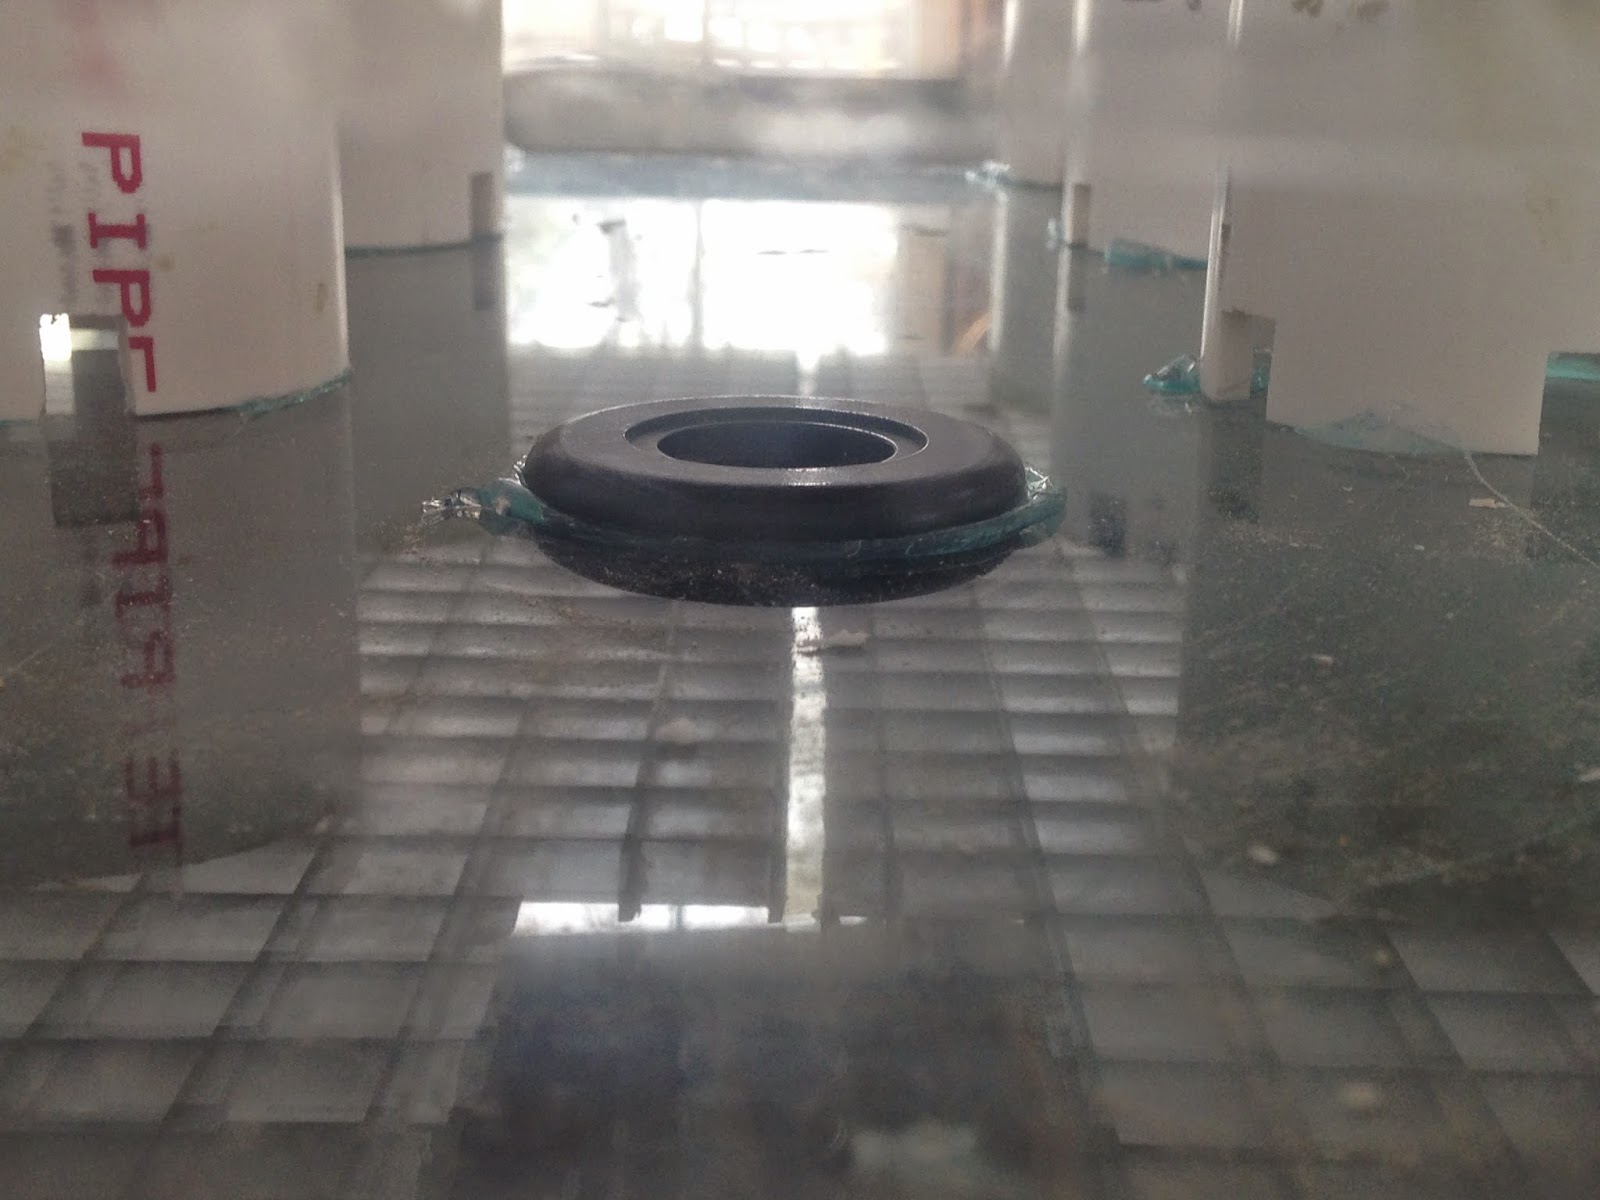
c. Cutting the hole for the drain required a diamond hole saw and then I installed a plastic bulkhead with a bead of silicon to seal it. Just make sure you cut the hole in accordance to what the bulkhead size requires. You can attach a drain hose to the bottom of the bulkhead and run it to a bucket under the tank. Here is a great youtube showing how to cut that hole without breaking the glass -- https://www.youtube.com/watch?v=C5hy6SjajQY
**After the bulkhead was installed and I was ready to permanently install the entire false floor, I put the floor in place and, from the bottom of the tank, marked where each pylon stood with a sharpie. Then I put some dabs of silicon on the inside of the glass bottom where I had marked to semi-securely attach the pylons to hold the floor in place.
TOP VIEW
BOTTOM VIEW

 I also cut a hole in the raised floor above the drain so I could reach in if necessary to clear out anything from the 'basement' after the frogs are in their new home. You will see later that I have space inside the 'tree trunk' backdrop which allows me to reach in from the top and access the drainage layer.
STEP 3 - Design and build a backdrop for the vivarium
I saw a really cool example of a vivarium backdrop using 'jungle vines' made from Great Stuff expanding foam, silicone and a mixture of peat moss and coconut husk. My idea was to form a wire frame for a tree trunk going up to the top of the tank with a couple smaller tree trunks as planters and then have these 'vines' growing on the trunk and on the walls. *Three of the sides of the hexagonal vivarium would be completely covered by the backdrop and three sides would be clear for viewing.
a. I started by created a base using the remainder of the plastic light diffuser panel. This would hold the tree trunk and the two planters. This was simply made by cutting the pieces using the Dremel tool and then super gluing the pieces together (super glue worked this time since it was just plastic to plastic).
.jpg)
I attached the pieces together WHILE inside the tank to make sure my wall angles were accurate (but being very careful to NOT superglue the base to my tank). After it set and was somewhat sturdy, I removed it and then added the wire 'tree trunks' using a roll of metal mesh from the hardware store. I bent it into the basic shapes and used small gauge wire to tie the frame onto the base.

The three planters I installed are actually regular cardboard planters painted inside and out with black 100% silicone. I suppose you could buy plastic planters but I happened to have these already and had the silicone ready for the jungle vine project a bit later. Make sure you have at least one pencil sized hole at the bottom of each planter for drainage.

*You might notice that the top of the tree trunk is slightly uneven and doesn't reach the top... I later created a lid of sorts to cover the top and also give me access to inside the backdrop for future maintenance if needed.
Well this ends PART 1... I will post PART 2 soon and show the rest of the process. It involved paper mache, lots of silicone and foam and eventually live plants!